React 初学者: 教程:React 简介 五
什么是React?
React 是一个用于构建用户界面的声明式、高效且灵活的 JavaScript 库。它使您可以从称为“组件”的小而孤立的代码组成复杂的 UI。
React 有几种不同类型的组件,但我们将从React.Component子类开始:
  class ShoppingList extends React.Component {
  render() {
    return (
      <div className="shopping-list">
        <h1>Shopping List for {this.props.name}</h1>
        <ul>
          <li>Instagram</li>
          <li>WhatsApp</li>
          <li>Oculus</li>
        </ul>
      </div>
    );
  }
}

// Example usage: <ShoppingList name="Mark" />
我们很快就会谈到有趣的类似 XML 的标签。我们使用组件来告诉 React 我们想在屏幕上看到什么。当我们的数据发生变化时,React 将有效地更新和重新渲染我们的组件。
在这里, ShoppingList 是一个React 组件类,或React 组件类型。组件接受参数,称为props(“属性”的缩写),并返回视图层次结构以通过该render方法显示。
该render方法返回您想在屏幕上看到的内容的_描述。_React 接受描述并显示结果。特别是,render返回一个React 元素,它是对要呈现的内容的轻量级描述。大多数 React 开发人员使用一种称为“JSX”的特殊语法,这使得这些结构更容易编写。语法在<div />构建时转换为React.createElement('div'). 上面的例子等价于:
  return React.createElement('div', {className: 'shopping-list'},
  React.createElement('h1', /* ... h1 children ... */),
  React.createElement('ul', /* ... ul children ... */)
);
如果您好奇,API 参考createElement()中有更详细的描述,但我们不会在本教程中使用它。相反,我们将继续使用 JSX。
JSX 具有 JavaScript 的全部功能。您可以将_任何_JavaScript 表达式放在 JSX 中的大括号内。每个 React 元素都是一个 JavaScript 对象,您可以将其存储在变量中或在程序中传递。
上面的ShoppingList组件只渲染内置的 DOM 组件,例如<div />和<li />。但是你也可以编写和渲染自定义的 React 组件。例如,我们现在可以通过编写来引用整个购物清单<ShoppingList />。每个 React 组件都经过封装,可以独立运行;这允许您从简单的组件构建复杂的 UI。
检查入门代码
如果您要在浏览器中处理本教程,请在新选项卡中打开此代码:Starter Code。如果您要在本地处理本教程,请在您的项目文件夹中打开(在设置src/index.js过程中您已经接触过此文件)。
此入门代码是我们正在构建的基础。我们提供了 CSS 样式,因此您只需专注于学习 React 和编程井字游戏。
通过检查代码,你会注意到我们有三个 React 组件:
- 正方形
- 木板
- 游戏
Square 组件渲染单个<button>,Board 渲染 9 个正方形。Game 组件使用占位符值渲染一个棋盘,稍后我们将对其进行修改。当前没有交互式组件。
通过道具传递数据
为了让我们的脚湿透,让我们尝试将一些数据从我们的 Board 组件传递到我们的 Square 组件。
我们强烈建议您在学习本教程时手动输入代码,而不是使用复制/粘贴。这将帮助您发展肌肉记忆和更强的理解力。
在 Board 的renderSquare方法中,更改代码以将调用的道具传递value给 Square:
  class Board extends React.Component {
  renderSquare(i) {
 return <Square value={i} />;  }
}
更改 Square 的方法以通过替换render来显示该值:{/* TODO */}{this.props.value}
  class Square extends React.Component {
  render() {
    return (
      <button className="square">
 {this.props.value}      </button>
    );
  }
}
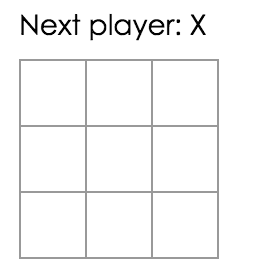
前:

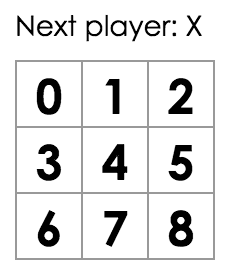
之后:您应该在渲染输出的每个方块中看到一个数字。

恭喜!您刚刚从父 Board 组件“传递了一个 prop”到子 Square 组件。传递 props 是 React 应用程序中信息从父母到孩子的流动方式。
制作交互式组件
当我们单击它时,让我们用“X”填充 Square 组件。首先,将从 Square 组件的render()函数返回的按钮标签更改为:
  class Square extends React.Component {
  render() {
    return (
 <button className="square" onClick={function() { console.log('click'); }}>        {this.props.value}
      </button>
    );
  }
}
如果您现在单击 Square,您应该会在浏览器的开发工具控制台中看到“单击”。
笔记
为了节省输入并避免 的混淆行为
this,我们将在此处和以下进一步使用事件处理程序的箭头函数语法: >class Square extends React.Component { render() { return ( <button className="square" onClick={() => console.log('click')}> {this.props.value} </button> ); } }请注意
onClick={() => console.log('click')},我们如何将_函数_作为onClick道具传递。React 只会在点击后调用这个函数。忘记() =>和写入onClick={console.log('click')}是一个常见的错误,并且会在每次组件重新渲染时触发。下一步,我们希望 Square 组件“记住”它被点击过,并用“X”标记填充它。为了“记住”事物,组件使用state。
React 组件可以通过
this.state在其构造函数中设置来获得状态。this.state应该被认为是其定义的 React 组件的私有。让我们将 Square 的当前值存储在 中this.state,并在单击 Square 时更改它。首先,我们将在类中添加一个构造函数来初始化状态:
  class Square extends React.Component {
 constructor(props) { super(props); this.state = { value: null, }; }
  render() {
    return (
      <button className="square" onClick={() => console.log('click')}>
        {this.props.value}
      </button>
    );
  }
}
笔记
在JavaScript 类中,您需要
super在定义子类的构造函数时始终调用。所有具有 a 的 React 组件类都constructor应该以super(props)调用开头。现在我们将更改 Square 的
render方法以在单击时显示当前状态的值:
- 替换
this.props.value为标签this.state.value内。<button>- 将
onClick={...}事件处理程序替换为onClick={() => this.setState({value: 'X'})}.- 将
className和onClick道具放在不同的行上以提高可读性。在这些更改之后,
<button>Square 的render方法返回的标签如下所示:``` class Square extends React.Component { constructor(props) { super(props); this.state = { value: null, }; }
render() { return ( ); } }
this.setState通过从onClickSquare 方法中的处理程序调用render,我们告诉 React 在单击 Square 时重新渲染它
当你调用setState一个组件时,React 也会自动更新其中的子组件。
开发者工具
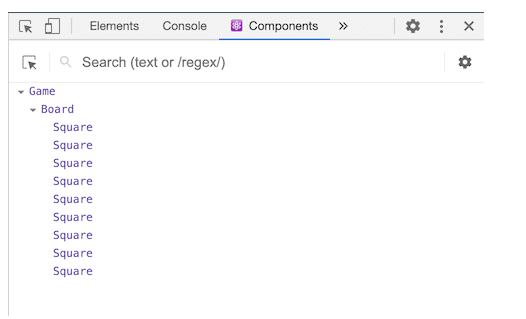
适用于Chrome和Firefox的 React Devtools 扩展允许您使用浏览器的开发人员工具检查 React 组件树。

React DevTools 可让您检查 React 组件的 props 和状态。
安装 React DevTools 后,您可以右键单击页面上的任何元素,单击“Inspect”打开开发者工具,React 选项卡(“⚛️ Components”和“⚛️ Profiler”)将作为最后一个选项卡出现在对。使用“⚛️ Components”检查组件树。
但是,请注意,还有一些额外的步骤可以让它与 CodePen 一起使用:
- 登录或注册并确认您的电子邮件(需要防止垃圾邮件)。
- 单击“分叉”按钮。
- 单击“更改视图”,然后选择“调试模式”。
- 在打开的新选项卡中,devtools 现在应该有一个 React 选项卡。
完成游戏
我们现在有了井字游戏的基本构建块。为了有一个完整的游戏,我们现在需要在棋盘上交替放置“X”和“O”,我们需要一种方法来确定获胜者。
提升状态
目前,每个 Square 组件都维护着游戏的状态。为了检查获胜者,我们将在一个位置保留 9 个方格中每个方格的值。
我们可能认为董事会应该只向每个 Square 询问 Square 的状态。尽管这种方法在 React 中是可行的,但我们不鼓励它,因为代码变得难以理解、容易出现错误并且难以重构。相反,最好的方法是将游戏的状态存储在父 Board 组件中,而不是存储在每个 Square 中。Board 组件可以通过传递一个 prop 来告诉每个 Square 要显示什么,就像我们向每个 Square 传递一个数字时所做的那样。
要从多个子组件收集数据,或让两个子组件相互通信,您需要在其父组件中声明共享状态。父组件可以使用 props 将状态向下传递给子组件;这使子组件相互之间以及与父组件保持同步。
当 React 组件被重构时,将状态提升到父组件中是很常见的——让我们借此机会尝试一下。
向 Board 添加一个构造函数,并将 Board 的初始状态设置为包含对应于 9 个正方形的 9 个空数组:
  class Board extends React.Component {
 constructor(props) { super(props); this.state = { squares: Array(9).fill(null), }; }
  renderSquare(i) {
    return <Square value={i} />;
  }
当我们稍后填写板时,this.state.squares数组将如下所示:
  [
  'O', null, 'X',
  'X', 'X', 'O',
  'O', null, null,
]
Board 的renderSquare方法目前如下所示:
    renderSquare(i) {
    return <Square value={i} />;
  }
一开始,我们将道具从 Board 向下传递,value以在每个 Square 中显示从 0 到 8 的数字。在之前的不同步骤中,我们将数字替换为由 Square 自身状态确定的“X”标记。这就是为什么 Square 目前忽略value了董事会传递给它的道具。
我们现在将再次使用道具传递机制。我们将修改 Board 以指示每个单独的 Square 关于其当前值('X'、'O'或null)。我们已经squares在 Board 的构造函数中定义了数组,我们将修改 Board 的renderSquare方法以从中读取:
    renderSquare(i) {
 return <Square value={this.state.squares[i]} />;  }
现在,每个 Square 都会收到一个valueprop,它可以是'X'、'O'或null空方格。
接下来,我们需要更改单击 Square 时发生的情况。Board 组件现在维护填充了哪些方格。我们需要为 Square 创建一种更新 Board 状态的方法。由于 state 被认为是定义它的组件私有的,我们不能直接从 Square 更新 Board 的 state。
相反,我们将一个函数从 Board 传递给 Square,当单击一个正方形时,我们将让 Square 调用该函数。我们将renderSquareBoard 中的方法更改为:
    renderSquare(i) {
    return (
      <Square
        value={this.state.squares[i]}
 onClick={() => this.handleClick(i)}      />
    );
  }
笔记
为了便于阅读,我们将返回的元素分成多行,并添加了括号,这样 JavaScript 就不会在后面插入分号
return并破坏我们的代码。现在我们将两个道具从 Board 传递到 Square:
value和onClick.onClickprop 是 Square 在单击时可以调用的函数。我们将对 Square 进行以下更改:
- 在 Square 的方法中替换
this.state.value为this.props.valuerender- 在 Square 的方法中替换
this.setState()为this.props.onClick()render- 从 Square中删除,
constructor因为 Square 不再跟踪游戏的状态在这些更改之后,Square 组件如下所示:
  class Square extends React.Component { render() {    return (
      <button
        className="square"
 onClick={() => this.props.onClick()}      >
 {this.props.value}      </button>
    );
  }
}
单击 Square 时,
onClick会调用 Board 提供的函数。以下是如何实现这一点的回顾:
2.  单击按钮时,React 将调用Square方法```onClick```中定义的事件处理程序。```render()```
3.  此事件处理程序调用```this.props.onClick()```. Square 的```onClick```道具由董事会指定。
4.  由于 Board 传递```onClick={() => this.handleClick(i)}```给 Square,Square 会```handleClick(i)```在单击时调用 Board。
5.  我们还没有定义```handleClick()```方法,所以我们的代码崩溃了。如果你现在点击一个方块,你应该会看到一个红色的错误屏幕,上面写着“this.handleClick is not a function”。

> 笔记
>
> DOM```<button>```元素的```onClick```属性对 React 具有特殊的意义,因为它是一个内置组件。对于像 Square 这样的自定义组件,命名由您决定。我们可以给 Square 的```onClick```prop 或 Board 的```handleClick```方法起任何名字,代码也一样。在 React 中,通常为```on[Event]```表示事件的 props 和```handle[Event]```处理事件的方法使用名称。

当我们试图点击一个 Square 时,我们应该得到一个错误,因为我们还没有定义```handleClick```。我们现在将添加```handleClick```到 Board 类:
class Board extends React.Component { constructor(props) { super(props); this.state = { squares: Array(9).fill(null), }; }
handleClick(i) { const squares = this.state.squares.slice(); squares[i] = ‘X’; this.setState({squares: squares}); }
renderSquare(i) {
return (
render() { const status = ‘Next player: X’;
return (
  <div>
    <div className="status">{status}</div>
    <div className="board-row">
      {this.renderSquare(0)}
      {this.renderSquare(1)}
      {this.renderSquare(2)}
    </div>
    <div className="board-row">
      {this.renderSquare(3)}
      {this.renderSquare(4)}
      {this.renderSquare(5)}
    </div>
    <div className="board-row">
      {this.renderSquare(6)}
      {this.renderSquare(7)}
      {this.renderSquare(8)}
    </div>
  </div>
);
} }
**[此时查看完整代码](https://zshipu.com/t?url=https://codepen.io/gaearon/pen/ybbQJX?editors=0010)**

在这些更改之后,我们再次能够单击方块来填充它们,就像我们以前一样。但是,现在状态存储在 Board 组件中,而不是单独的 Square 组件中。当 Board 的状态发生变化时,Square 组件会自动重新渲染。保持 Board 组件中所有方格的状态将使其能够确定未来的获胜者。

由于 Square 组件不再保持状态,因此 Square 组件从 Board 组件接收值并在单击时通知 Board 组件。在 React 术语中,Square 组件现在是**受控组件**。董事会对其拥有完全控制权。

请注意如何在 中```handleClick```,我们调用```.slice()```创建```squares```要修改的数组的副本,而不是修改现有数组。```squares```我们将在下一节解释为什么要创建数组的副本。

### 为什么不变性很重要

在前面的代码示例中,我们建议您```squares```使用该```slice()```方法创建数组的副本,而不是修改现有数组。我们现在将讨论不变性以及为什么学习不变性很重要。

更改数据通常有两种方法。第一种方法是通过直接_更改_数据的值来改变数据。第二种方法是用具有所需更改的新副本替换数据。

#### 突变的数据变化
var player = {score: 1, name: ‘Jeff’}; player.score = 2; // Now player is {score: 2, name: ‘Jeff’}
#### 无突变的数据更改
var player = {score: 1, name: ‘Jeff’};
var newPlayer = Object.assign({}, player, {score: 2}); // Now player is unchanged, but newPlayer is {score: 2, name: ‘Jeff’}
// Or if you are using object spread syntax proposal, you can write: // var newPlayer = {…player, score: 2};
最终结果是相同的,但通过不直接改变(或更改基础数据),我们获得了如下所述的几个好处。

#### 复杂的功能变得简单

不变性使复杂的功能更容易实现。在本教程的后面,我们将实现一个“时间旅行”功能,它允许我们回顾井字游戏的历史并“跳回”到之前的动作。此功能并非特定于游戏 - 撤消和重做某些操作的能力是应用程序中的常见要求。避免直接的数据突变让我们可以保持游戏历史的先前版本完整,并在以后重用它们。

#### 检测变化

检测可变对象的变化很困难,因为它们是直接修改的。这种检测需要将可变对象与其自身的先前副本进行比较,并需要遍历整个对象树。

检测不可变对象的变化要容易得多。如果被引用的不可变对象与前一个不同,则该对象已更改。

#### 确定何时在 React 中重新渲染

不变性的主要好处是它可以帮助您在 React 中构建_纯组件。_不可变数据可以轻松确定是否进行了更改,这有助于确定组件何时需要重新渲染。

您可以通过阅读[Optimizing Performance](https://zshipu.com/t?url=https://reactjs.org/docs/optimizing-performance.html#examples)了解更多关于```shouldComponentUpdate()```以及如何构建_纯组件_的信息。

### 功能组件

我们现在将 Square 更改为**函数组件**。

在 React 中,**函数组件**是一种更简单的编写组件的方法,它只包含一个```render```方法并且没有自己的状态。```React.Component```我们可以编写一个函数,将```props```其作为输入并返回应该呈现的内容,而不是定义一个扩展的类。函数组件写起来没有类那么繁琐,很多组件都可以这样表达。

用这个函数替换 Square 类:
function Square(props) { return ( ); }
我们已经改变```this.props```了```props```它出现的两次。

**[此时查看完整代码](https://zshipu.com/t?url=https://codepen.io/gaearon/pen/QvvJOv?editors=0010)**

> 笔记
>
> 当我们将 Square 修改为函数组件时,我们也改成```onClick={() => this.props.onClick()}```了更短的(注意_两边_```onClick={props.onClick}```没有括号)。

### 轮流

我们现在需要修复井字游戏中的一个明显缺陷:无法在棋盘上标记“O”。

默认情况下,我们将第一步设置为“X”。我们可以通过修改 Board 构造函数中的初始状态来设置此默认值:
class Board extends React.Component { constructor(props) { super(props); this.state = { squares: Array(9).fill(null), xIsNext: true, }; }
每次玩家移动时,```xIsNext```(布尔值)将被翻转以确定下一个玩家并保存游戏状态。我们将更新 Board 的```handleClick```函数以翻转 的值```xIsNext```:
handleClick(i) {
const squares = this.state.squares.slice();
squares[i] = this.state.xIsNext ? ‘X’ : ‘O’; this.setState({ squares: squares, xIsNext: !this.state.xIsNext, }); }
通过这种变化,“X”和“O”可以轮流使用。尝试一下!

让我们还更改 Board 中的“状态”文本,```render```以便显示下一个回合的玩家:
render() {
const status = ‘Next player: ‘ + (this.state.xIsNext ? ‘X’ : ‘O’); return ( // the rest has not changed
应用这些更改后,您应该拥有此 Board 组件:
class Board extends React.Component { constructor(props) { super(props); this.state = { squares: Array(9).fill(null), xIsNext: true, }; }
handleClick(i) { const squares = this.state.squares.slice(); squares[i] = this.state.xIsNext ? ‘X’ : ‘O’; this.setState({ squares: squares, xIsNext: !this.state.xIsNext, }); }
renderSquare(i) {
return (
render() { const status = ‘Next player: ‘ + (this.state.xIsNext ? ‘X’ : ‘O’); return (
**[此时查看完整代码](https://zshipu.com/t?url=https://codepen.io/gaearon/pen/KmmrBy?editors=0010)**

### 宣布获胜者

既然我们显示了下一个回合是哪个玩家,我们还应该显示游戏何时获胜并且没有更多回合可做。复制此辅助函数并将其粘贴到文件末尾:
function calculateWinner(squares) { const lines = [ [0, 1, 2], [3, 4, 5], [6, 7, 8], [0, 3, 6], [1, 4, 7], [2, 5, 8], [0, 4, 8], [2, 4, 6], ]; for (let i = 0; i < lines.length; i++) { const [a, b, c] = lines[i]; if (squares[a] && squares[a] === squares[b] && squares[a] === squares[c]) { return squares[a]; } } return null; }
给定一个由 9 个方格组成的数组,此函数将检查获胜者并根据需要返回```'X'```、```'O'```或```null```。

我们将调用```calculateWinner(squares)```Board 的```render```函数来检查玩家是否获胜。如果玩家赢了,我们可以显示诸如“Winner: X”或“Winner: O”之类的文本。我们将使用以下代码替换```status```Board```render```函数中的声明:
render() {
const winner = calculateWinner(this.state.squares); let status; if (winner) { status = ‘Winner: ‘ + winner; } else { status = ‘Next player: ‘ + (this.state.xIsNext ? ‘X’ : ‘O’); } return ( // the rest has not changed
handleClick```如果有人赢了游戏或者广场已经被填满,我们现在可以通过忽略点击来更改 Board 的功能以提前返回:
    handleClick(i) {
    const squares = this.state.squares.slice();
 if (calculateWinner(squares) || squares[i]) { return; }    squares[i] = this.state.xIsNext ? 'X' : 'O';
    this.setState({
      squares: squares,
      xIsNext: !this.state.xIsNext,
    });
  }
恭喜!您现在有一个有效的井字游戏。而且你也刚刚学习了 React 的基础知识。所以_你_可能是这里真正的赢家。
添加时间旅行
作为最后的练习,让我们可以“回到过去”到游戏中的先前动作。
存储移动历史
如果我们改变squares数组,实现时间旅行将非常困难。
但是,我们习惯在每次移动后创建一个新的数组slice()副本,并将其视为不可变的。这将允许我们存储数组的每个过去版本,并在已经发生的转弯之间导航。squaressquares
我们会将过去的squares数组存储在另一个名为history. 该history数组代表所有棋盘状态,从第一次移动到最后一次移动,并具有如下形状:
  history = [
  // Before first move
  {
    squares: [
      null, null, null,
      null, null, null,
      null, null, null,
    ]
  },
  // After first move
  {
    squares: [
      null, null, null,
      null, 'X', null,
      null, null, null,
    ]
  },
  // After second move
  {
    squares: [
      null, null, null,
      null, 'X', null,
      null, null, 'O',
    ]
  },
  // ...
]
现在我们需要决定哪个组件应该拥有history状态。
再次提升状态
我们希望顶级 Game 组件显示过去移动的列表。它需要访问 来history做到这一点,所以我们将把history状态放在顶级 Game 组件中。
将状态放入 Game 组件中可以让我们从其子 Board 组件history中移除状态。squares就像我们将状态从 Square 组件“提升”到 Board 组件一样,我们现在将它从 Board 提升到顶级 Game 组件。这使 Game 组件可以完全控制 Board 的数据,并让它指示 Board 从history.
首先,我们将在其构造函数中设置 Game 组件的初始状态:
  class Game extends React.Component {
 constructor(props) { super(props); this.state = { history: [{ squares: Array(9).fill(null), }], xIsNext: true, }; }
  render() {
    return (
      <div className="game">
        <div className="game-board">
          <Board />
        </div>
        <div className="game-info">
          <div>{/* status */}</div>
          <ol>{/* TODO */}</ol>
        </div>
      </div>
    );
  }
}
接下来,我们将让 Board 组件接收来自 Game 组件的 props squares。onClick由于我们现在在 Board 中有一个用于许多 Squares 的单击处理程序,我们需要将每个 Square 的位置传递给onClick处理程序以指示单击了哪个 Square。以下是转换 Board 组件所需的步骤:
- 删除
constructorin Board。 - 替换
this.state.squares[i]为this.props.squares[i]板中的renderSquare. - 替换
this.handleClick(i)为this.props.onClick(i)板中的renderSquare.
Board 组件现在看起来像这样:
  class Board extends React.Component {
  handleClick(i) {
    const squares = this.state.squares.slice();
    if (calculateWinner(squares) || squares[i]) {
      return;
    }
    squares[i] = this.state.xIsNext ? 'X' : 'O';
    this.setState({
      squares: squares,
      xIsNext: !this.state.xIsNext,
    });
  }

  renderSquare(i) {
    return (
      <Square
 value={this.props.squares[i]} onClick={() => this.props.onClick(i)}      />
    );
  }

  render() {
    const winner = calculateWinner(this.state.squares);
    let status;
    if (winner) {
      status = 'Winner: ' + winner;
    } else {
      status = 'Next player: ' + (this.state.xIsNext ? 'X' : 'O');
    }

    return (
      <div>
        <div className="status">{status}</div>
        <div className="board-row">
          {this.renderSquare(0)}
          {this.renderSquare(1)}
          {this.renderSquare(2)}
        </div>
        <div className="board-row">
          {this.renderSquare(3)}
          {this.renderSquare(4)}
          {this.renderSquare(5)}
        </div>
        <div className="board-row">
          {this.renderSquare(6)}
          {this.renderSquare(7)}
          {this.renderSquare(8)}
        </div>
      </div>
    );
  }
}
我们将更新 Game 组件的render函数以使用最近的历史记录来确定和显示游戏的状态:
    render() {
 const history = this.state.history; const current = history[history.length - 1]; const winner = calculateWinner(current.squares); let status; if (winner) { status = 'Winner: ' + winner; } else { status = 'Next player: ' + (this.state.xIsNext ? 'X' : 'O'); }
    return (
      <div className="game">
        <div className="game-board">
 <Board            squares={current.squares}            onClick={(i) => this.handleClick(i)}          />        </div>
        <div className="game-info">
 <div>{status}</div>          <ol>{/* TODO */}</ol>
        </div>
      </div>
    );
  }
由于 Game 组件现在正在渲染游戏的状态,我们可以从 Board 的render方法中删除相应的代码。重构后,Board 的render功能如下:
    render() { return ( <div> <div className="board-row">          {this.renderSquare(0)}
          {this.renderSquare(1)}
          {this.renderSquare(2)}
        </div>
        <div className="board-row">
          {this.renderSquare(3)}
          {this.renderSquare(4)}
          {this.renderSquare(5)}
        </div>
        <div className="board-row">
          {this.renderSquare(6)}
          {this.renderSquare(7)}
          {this.renderSquare(8)}
        </div>
      </div>
    );
  }
最后,我们需要将handleClick方法从 Board 组件移动到 Game 组件。我们还需要修改handleClick,因为 Game 组件的状态结构不同。在 Game 的handleClick方法中,我们将新的历史条目连接到history.
    handleClick(i) {
 const history = this.state.history; const current = history[history.length - 1]; const squares = current.squares.slice();    if (calculateWinner(squares) || squares[i]) {
      return;
    }
    squares[i] = this.state.xIsNext ? 'X' : 'O';
    this.setState({
 history: history.concat([{ squares: squares, }]),      xIsNext: !this.state.xIsNext,
    });
  }
笔记
此时,Board 组件只需要```renderSquare```and```render```方法。游戏的状态和```handleClick```方法应该在 Game 组件中。

**[此时查看完整代码](https://zshipu.com/t?url=https://codepen.io/gaearon/pen/EmmOqJ?editors=0010)**

### 显示过去的动作

由于我们正在记录井字游戏的历史,我们现在可以将其作为过去移动的列表显示给玩家。

我们之前了解到 React 元素是一流的 JavaScript 对象。我们可以在我们的应用程序中传递它们。要在 React 中渲染多个项目,我们可以使用 React 元素数组。

在 JavaScript 中,数组有一个通常用于将数据映射到其他数据的[```map()```方法,例如:](https://zshipu.com/t?url=https://developer.mozilla.org/en-US/docs/Web/JavaScript/Reference/Global_Objects/Array/map)
const numbers = [1, 2, 3]; const doubled = numbers.map(x => x * 2); // [2, 4, 6]
使用该```map```方法,我们可以将我们的移动历史映射到表示屏幕上按钮的 React 元素,并显示一个按钮列表以“跳转”到过去的移动。

让我们```map```结束```history```游戏中的```render```方法:
render() { const history = this.state.history; const current = history[history.length - 1]; const winner = calculateWinner(current.squares);
const moves = history.map((step, move) => { const desc = move ? ‘Go to move #’ + move : ‘Go to game start’; return (
return (
  <div className="game">
    <div className="game-board">
      <Board
        squares={current.squares}
        onClick={(i) => this.handleClick(i)}
      />
    </div>
    <div className="game-info">
      <div>{status}</div>
- {moves}


